| Sizes | Chest circumference (cm) | Strap B (Back) | Strap D (Sternum) |
|---|---|---|---|
| XXXS | 30-40 | 7,5 | 7-9,5 |
| XXS | 33-45 | 7 | 8,5-11 |
| XXSL | 33-45 | 8,5 | 10,5-16 |
| XS | 40-55 | 8,5 | 10,5-16 |
| XSL | 40-55 | 11,5 | 14-22 |
| S | 50-75 | 11,5 | 14-22 |
| SL | 50-75 | 13,5 | 17-28 |
| S2H | 55-73 | 13,5 | 10,5-17 |
| M | 60-90 | 13,5 | 17-28 |
| ML | 60-90 | 16,5 | 20-33 |
| M2H | 70-88 | 16,5 | 15,5-25 |
| L | 75-110 | 16,5 | 20-33 |
| L2H | 76-112 | 20 | 23-40 |
| XL | 85-130 | 20 | 23-40 |
NB: S2H, M2H, L2H correspondent aux harnais double sangle ventrale pour cage thoracique profonde.
Here is how to proceed to obtain this result:
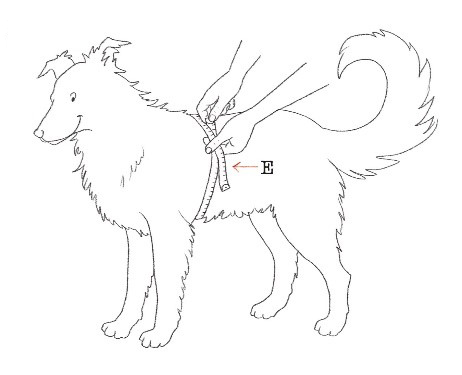
First, we take the chest circumference measurement (E) - in this example, 72 cm - which gives us an indication for at least two potential sizes, one of which will be the Long version (only for XS, S, M).
| Suggested sizes | Chest circumference (cm) | Strap B (Back) | Strap D (Sternum) |
|---|---|---|---|
| S | 55-75 | 11,5 | 14-22 |
| SL | 55-75 | 13,5 | 17-28 |
| S2H | 55-735 | 13,5 | 10,5-17 |
| M | 70-90 | 13,5 | 17-28 |
| ML | 70-90 | 16,5 | 20-33 |
| M2H | 70-88 | 16,5 | 15,5-25 |
This means Dora could wear either a size S almost fully extended, or a size M almost fully tightened.
While this is not a strict rule, our suggestion in these cases would be to choose the larger size to allow, for example, for any potential weight gain, the inevitable shrinking of the strap (around 7%), or even to accommodate the use of a winter coat.
Some people prefer choosing the smaller size because it is lighter.
We chose size M for Dora.
However, we can see in the configurator chart that for the same chest circumference, the table also suggests the ML (or Medium Long) size.
Which one to choose?
The 'Long' sizes were designed to ensure the dog's maximum mobility and comfort by providing enough space between the shoulder and the strap to avoid rubbing under the armpits and to allow the shoulder blade to move freely without constraints.
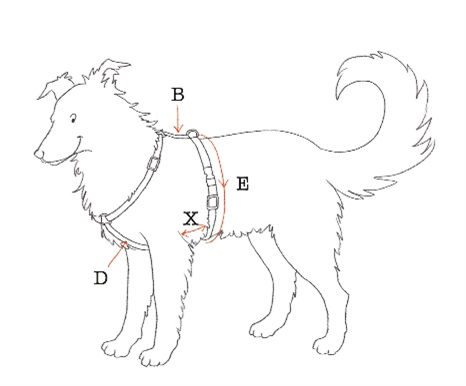
Let's now see how to evaluate this parameter, which we will call X:
We will consider the B and D measurements of the harness (next image).
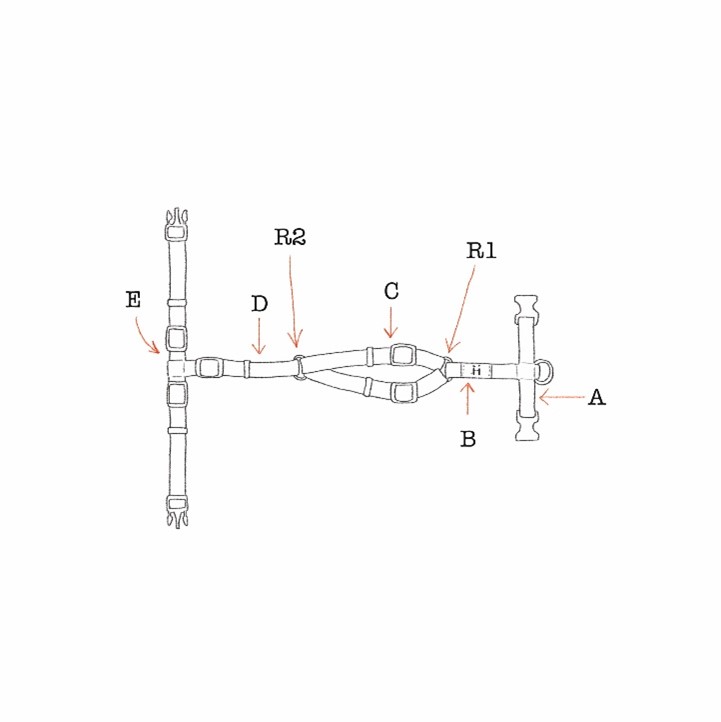
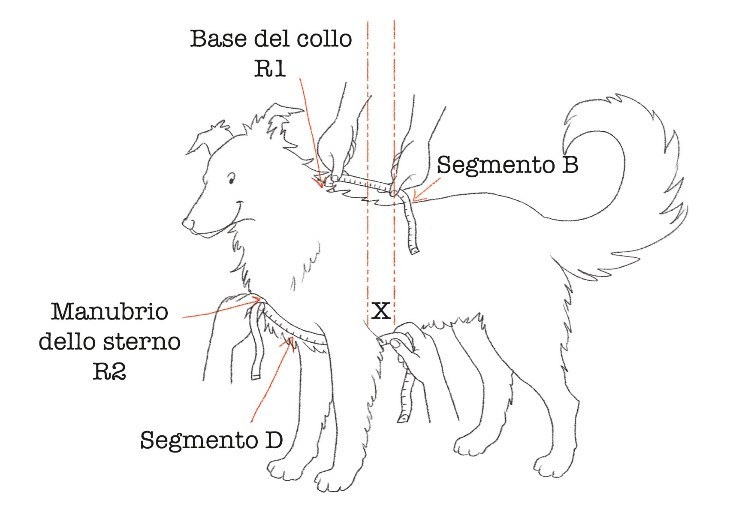
The B segment is the non-adjustable part that rests along the spine from the base of the neck to the leash ring.
The D segment is adjustable and runs along the dog's sternum.
The correct choice of B and D lengths (based on what is shown by the configurator) will allow the E segment, once the harness is fastened, to stay away from the dog's armpits and shoulder blades, with a distance of about four fingers.
Note: As a reference, it's important to consider that the R1 ring should be at the base of the neck, between the shoulder blades (cervicothoracic junction of the spine), and the R2 ring should correspond to the tip of the sternum (manubrium).
At this point, knowing the measurements of the B and D segments for the suggested harness sizes, you can choose either the Standard or Long version based on what you've verified on your dog.
The Long version is generally more suitable for long-bodied dogs like Corgis and Dachshunds, but it can also work for other breeds with an elongated morphology.